Energizer Power Indicator Light
 Voir les directives en français canadien
HOW TO USE:
DIGITAL DISPLAY
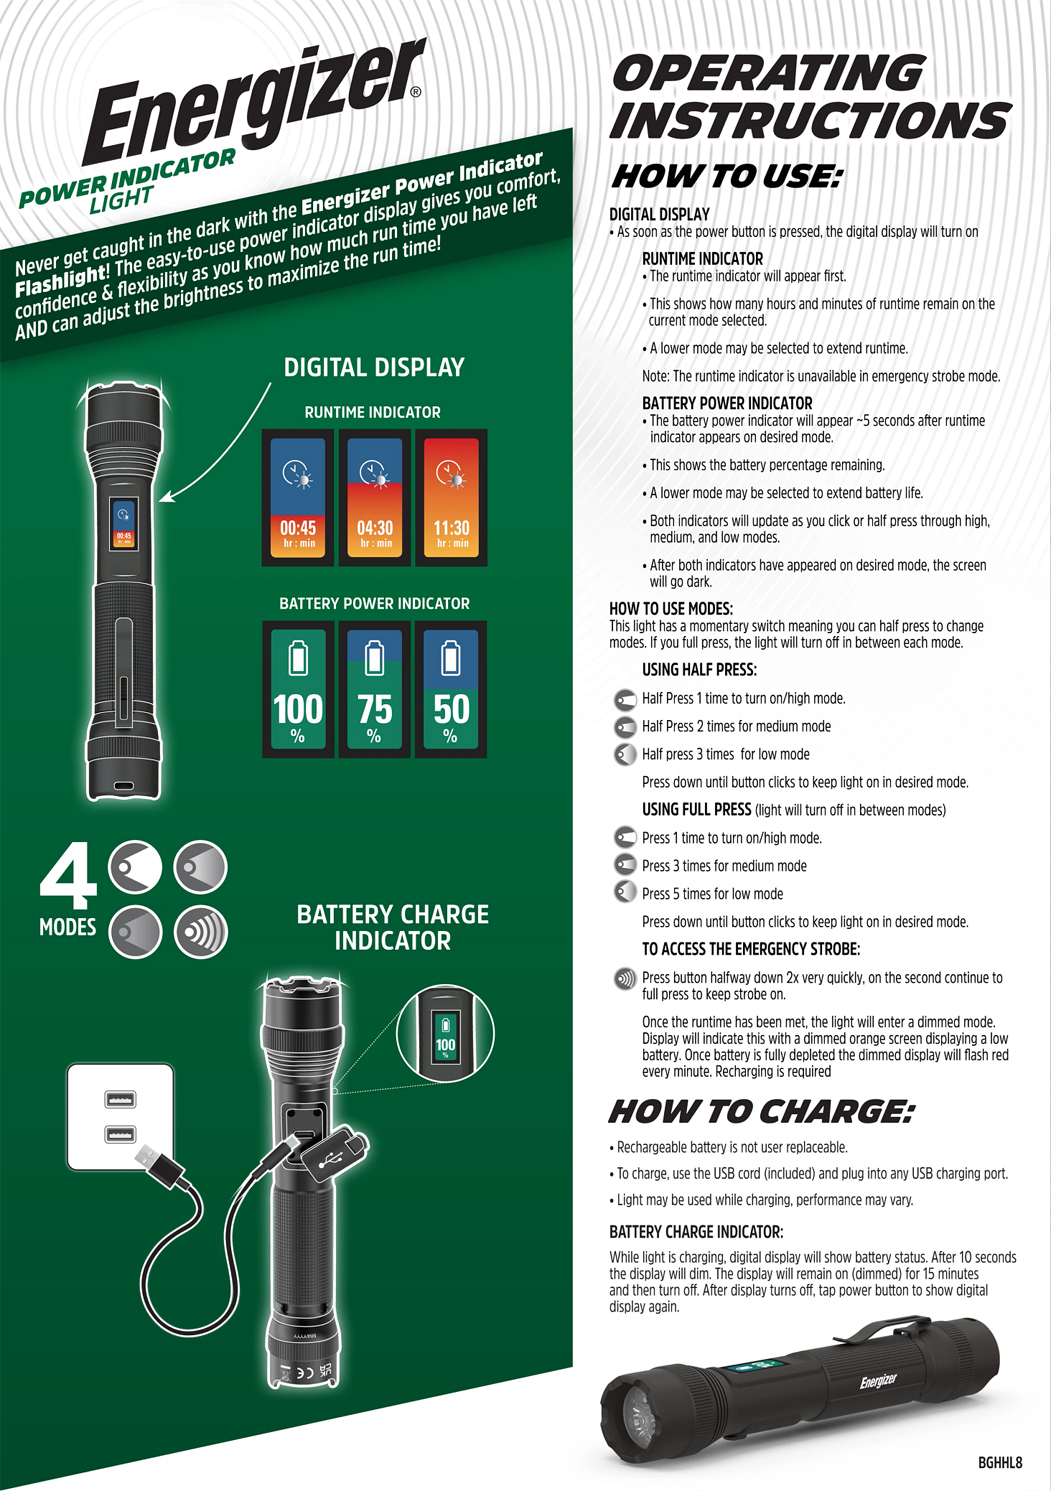
As soon as the power button is pressed, the digital display will turn on
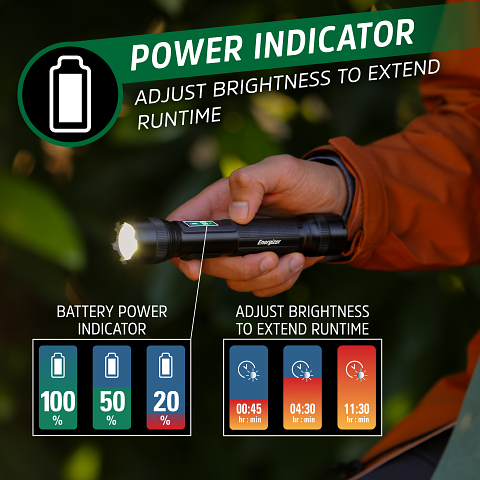
1. RUNTIME INDICATOR
The runtime indicator will appear first
This shows how many hours and minutes of runtime remain on the current mode selected.
A lower mode may be selected to extend runtime.
Note: The runtime indicator is unavailable in emergency strobe mode
3. BATTERY POWER INDICATOR
The battery power indicator will appear ~5 seconds after the runtime indicator appears on desired mode
This shows the battery percentage remaining
A lower mode may be selected to extend battery life.
Both indicators will update as you click or half press through high, medium, and low modes
After both indicators have appeared on desired mode, the screen will go dark.
2. HOW TO USE MODES:
USING HALF PRESS
half press 1 time to turn on/high mode
half press 2 times for medium mode
half press 3 times for low mode
USING FULL PRESS (Light will turn off in between modes)
press 1 time for on/high mode
press 3 times for medium mode
press 5 times for low mode
TO ACCESS THE EMERGENCY STROBE
press button halfway down 2x very quickly, on the second continue to full press to keep strobe on
Once the run time has been met, the light will enter a dimmed mode. Display will indicate this with a dimmed orange screen displaying a low battery. Once battery is fully depleted the dimmed display will flash red every minute. Recharging is required
HOW TO CHARGE
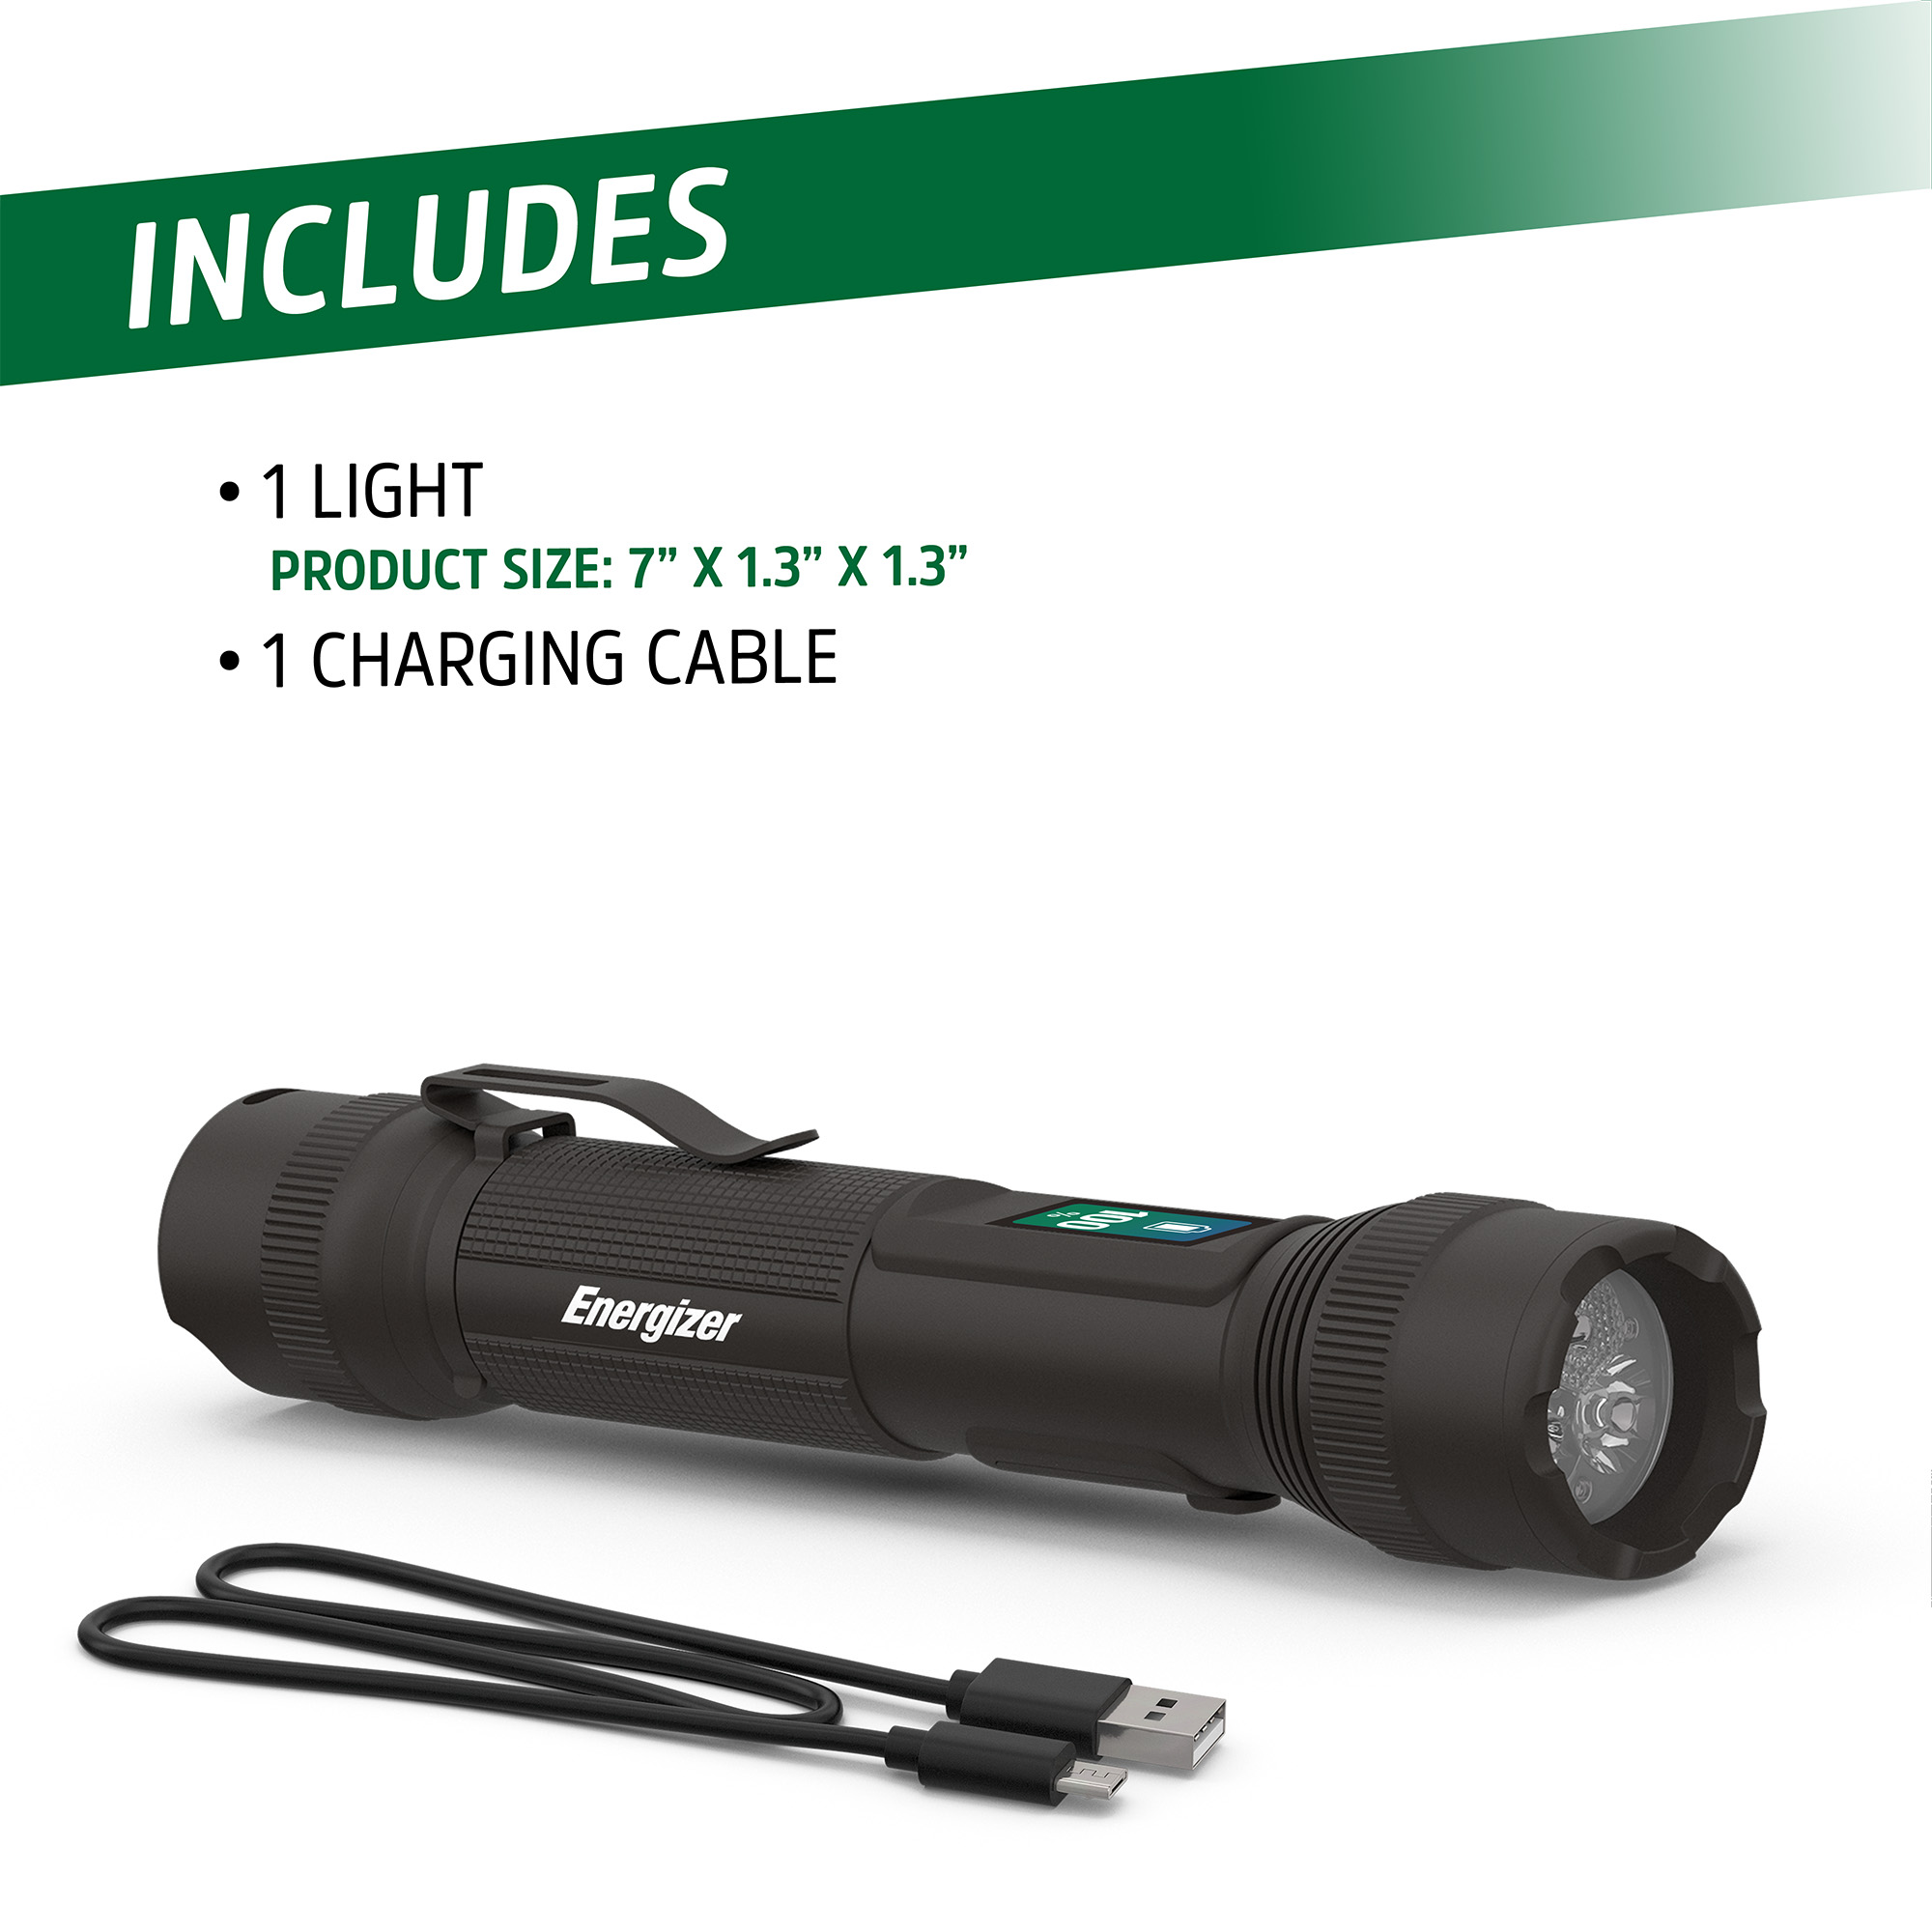
1. charge with included USB
Rechargeable battery is not user replaceable.
To charge use included USB cord and plug light into any USB charging port.
Light may be used while charging, performance may vary.
BATTERY CHARGE INDICATOR
While light is charging, digital display will show battery status. After 10 seconds, the display will dim. The display will remain on (dimmed) for 15 minutes and then turn off. After display turns off, tap power button to show digital display again.
REMOVEABLE CLIP
1. Removeable clip can be used in both orientations