AUTO SAFETY LIGHT

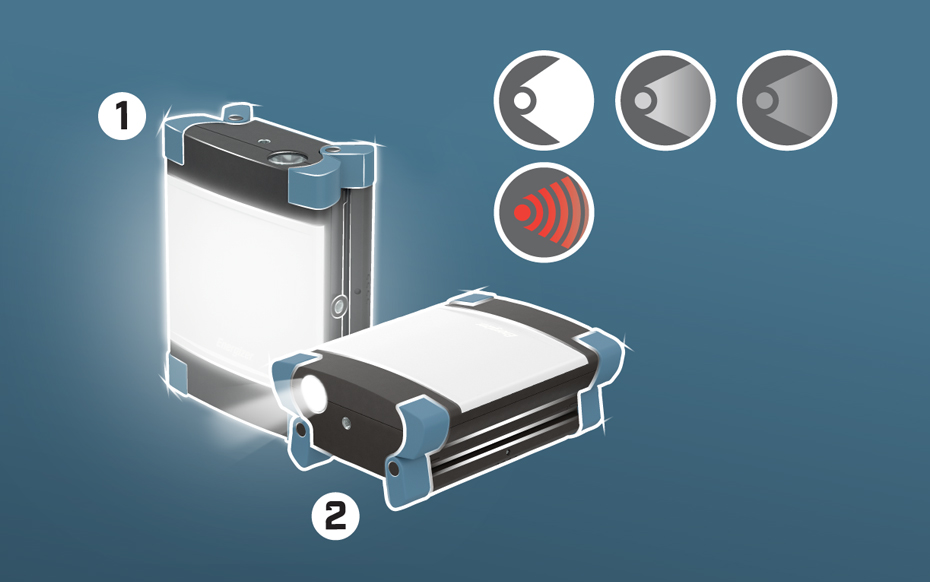
Energizer’s Auto Safety Light is designed with safety, power, performance, durability and functionality in mind. This versatile light offers hands-free usage, making it perfect for auto emergencies, repairs or DIY projects. It features both an area light and a directional light, allowing you to work under the bonnet, on the engine or on the ground to change a tyre.
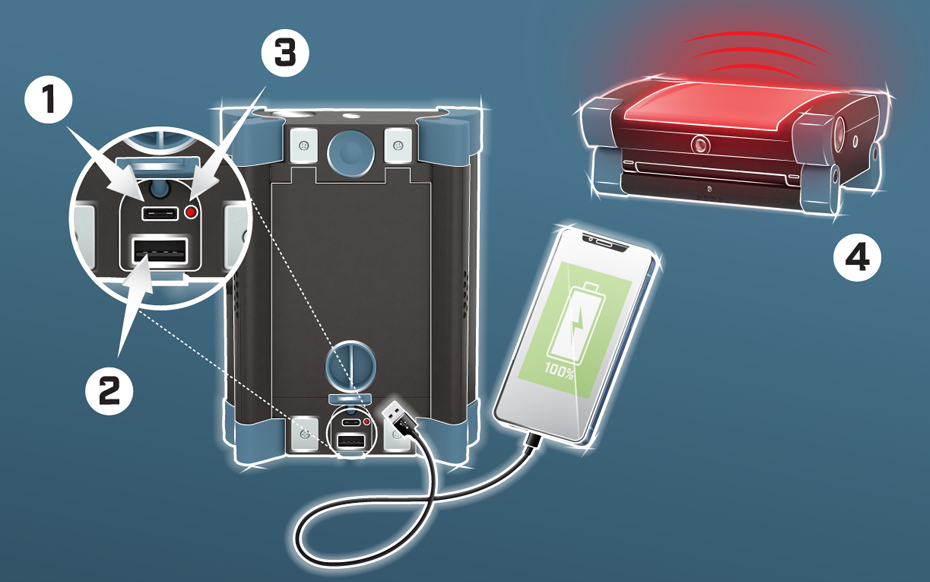
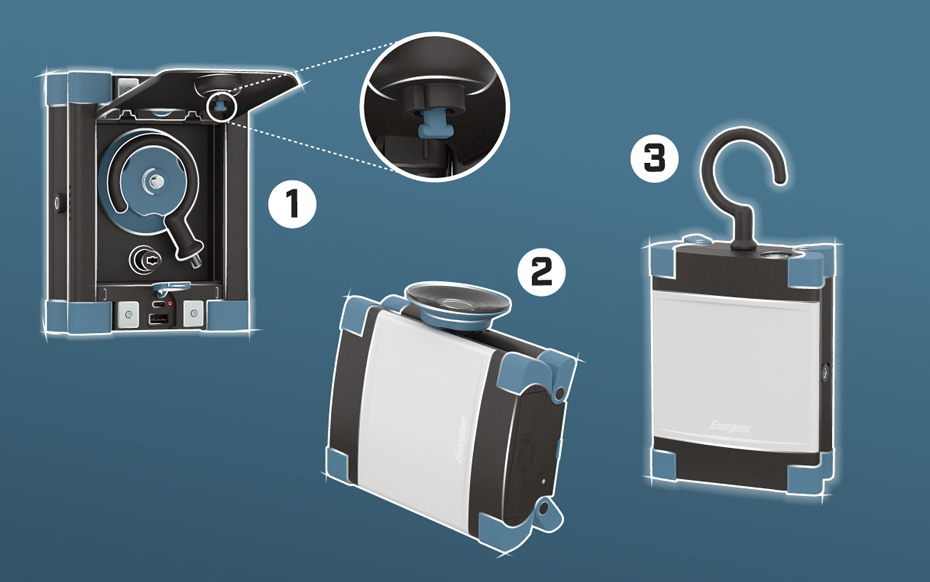
For added convenience, the light includes a hanger hook, magnetic base, and suction cup, so you can confidently place it wherever you need. Two threaded standard tripod attachment points provide even more versatility. Plus, it has a built-in power bank with a USB port to charge your devices, ensuring you’re always prepared.

OPERATING INSTRUCTIONS

HOW TO USE :

1. FOR AREA LIGHT

  • Press 1 time for high
  • Press 2 times for medium
  • Press 3 times for low
  • Press and hold at any time for red flashing

2. FOR DIRECTIONAL LIGHT

PRESS 4 times for directional light

HOW TO CHARGE :

Light may be used in low mode while charging (in or out) but charging time will be increased. For best charging performance, charge (in or out) with the light turned off.

1. TO CHARGE LIGHT

Connect the provided USB cable to the light, then plug it into any USB charging port.

2. TO CHARGE DEVICE

Connect the device’s cable to the charging port, then plug in the device to start charging.

3. Charging Indicator

A charging indicator light is located near charging port and will illuminate when the USB charging has started.​
Red Flashing = Charging Light
Red = Charging Light Complete​
Green = Charging Device

4. LOW BATTERY INDICATOR

Area Light will flash red when battery is low

DESIGN FEATURES :

1. STORAGE AREA

  • SUCTION CUP, HOOK AND CHARGING CABLE CAN BE STORED IN THE DESIGNATED STORAGE AREA
  • For optimal storing, place the suction cup in first (suction side down) and place hook around suction cup.
  • To access storage, turn knob to the left to unlock. Pull to open.
  • To close storage, close door and turn knob to the right to lock.

ATTACHMENTS

  • This light features two metal threaded areas compatible with standard tripod mounts.
  • Both the suction cup and hanger hook can be attached to either threaded area, offering versatile mounting options.

2. Suction Cup

  • Moisten the suction cup for better adhesion, especially on vertical surfaces.
  • Place the cup on the surface, press down, and tighten the knob.
  • Connect the light at the metal threaded area.
  • To remove the light, first release the suction by turning the knob anticlockwise.
  • Use the tab on the suction cup to help remove it.
  • Keep the suction cup clean for best performance.

3. HANGER HOOK

  • Attach the hook to a metal threaded area.
  • Twist the hook into the threaded area until it is securely fastened.